-Photography 101, led by my friends Jenney and Elizabeth. Great stuff there!
-If you don't have a photo editing program, you must go to picnik.com. (like, go there, right NOW- you can come back here later!). And there is no registration required- you can just get started right away. Click on the create button to get Holga, Lomo, Selective BW/color, doodling, 60s style, and tons more of options. Way cool.
Today's Workshop Wednesday is focused on those little changes you can make in photoshop to really make a good photograph turn into a great one!
Here is a slideshow I have made with a few recent photos of my sister that I tweaked, either with these ideas below, or just with PW's actions. If you take the plunge and mess around with either photoshop, picnik, or some other editing program this week, upload your photo to the slideshow!
Ok, on to Workshop Wednesday. Here is a cutie patootie photo I took yesterday of my Em:Pretty cute, and good colors on its own... but I am now addicted to photoshop so I needed to tweak it just a bit.

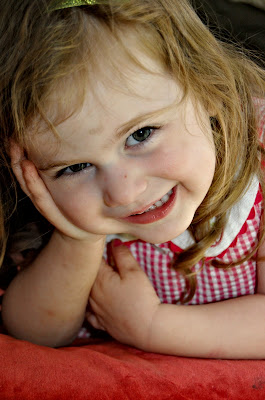
As I've learned from the Pioneer Woman, when it comes to photoshop, sometimes it's the little things you do that makes a photo look sleek and professional, not the huge edits. So I've been trying to be a little conservative with some of my edits to try that out. (It's so easy to get carried away!) (Click on any of the photos to see them larger) The first thing you want to do is open your photo:
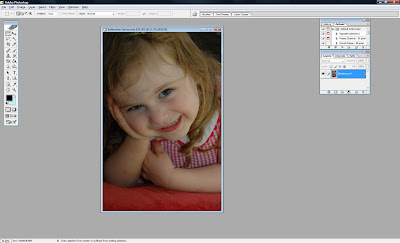
Then I like to adjust the levels. (Layer>New Adjustment Layer>Levels)
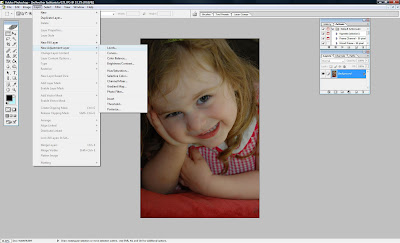
A little window pops up with your layer in it, click ok,
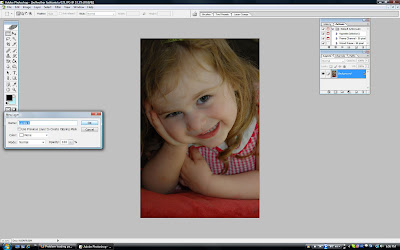 and then this window opens. You can adjust the sliders back and forth to see the changes it makes. I usually like to take the middle slider and either go to the left or right to see how it changes the tones.
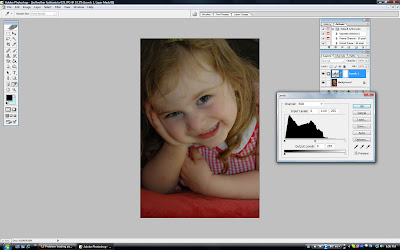
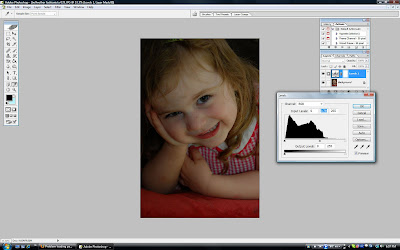
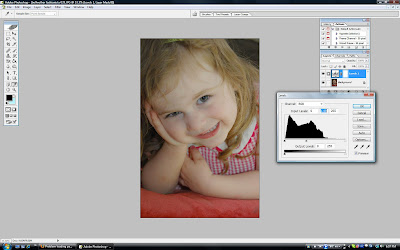
Once you're settled with a tone you like, you can click Ctrl-Shift-E to flatten your layers together. (By the way, layers are basically just ways of copying your photo and putting it right on top of your photo, so you can make an edit without adjusting the original photo. If you don't flatten your layers, you can go back and delete layers with edits on them if you don't like the end result, without having to start all over. )
Next, I like to adjust the brightness/contrast. Layer>New Adjustment Layer>Brightness/Contrast.

Click ok on the new dialogue box, and then this window appears. You can again adjust the sliders depending on your preference.
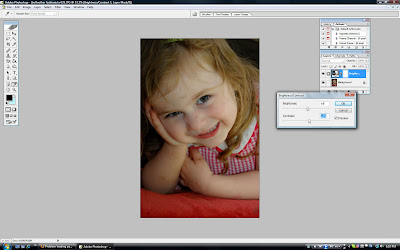 Then flatten the image (Ctrl-Shift-E)
Looks pretty good, eh?
The last thing I like to do to boost up the contrast and sharpness a little bit is to do a trick I learned when I was trying out the Lomo Conversion (over on the left in the sidebar).
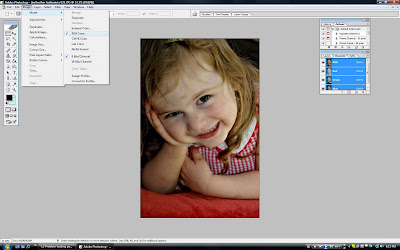
Click on Image>Mode>Lab Color

Then in that little box floating on the right, click on the Channels tab, then "Lightness."
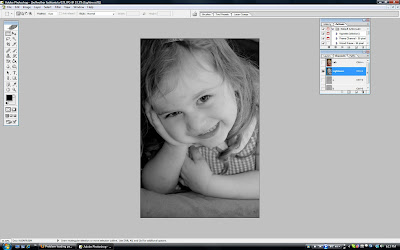
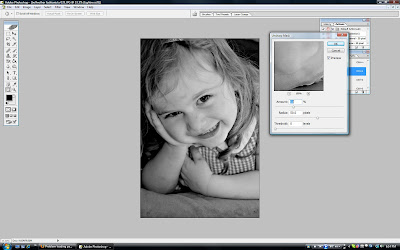
Then I like to do the ol' trusty unsharp mask. (Don't ask me why it's called "Unsharp" mask, because it's for sharpening. I'm sure some computery geek would know.)
Filter>Sharpen>Unsharp Mask
 You can go really extreme with this, I did 50 (amount), 50 (radius), 0 (threshold), or you can keep it a little less dramatic.
 Convert back to a full color pic by Image>Mode>RGB color.
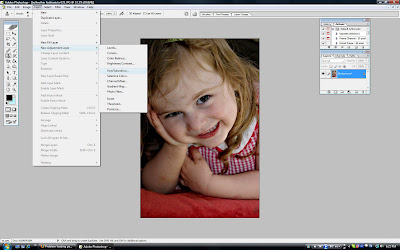
  Another nifty thing to do, if you think a photo is too warm, cool, yellow tinted, or whatev, is to do a photo filter.
I accidentally had my cursor on gradient map, but go one below and click on Photo Filter. (Layer>New Adjustment Layer>Photo Filter).
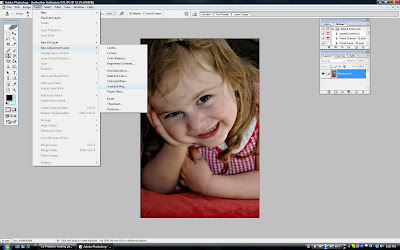
Click on the filter you would like to choose. You can experiment here... slide the slider at the bottom of that little window to increase or decrease the amount of the filter.

I thought this photo needed to be cooled down a little bit, but I didn't want to use the cooling filter because then everything looked too blue, so I chose violet.
 One way that I like to turn a photo black and white is to use the gradient map. It seems to make it look more distinctive and not as "flat." Layer>New Adjustment Layer, Gradient Map.
 Click the little downy arrow on that box, and then click on the third block to the right to make it black and white (or you could experiment with the other options). Make sure to flatten the image if you are done (Ctrl-shift-E)
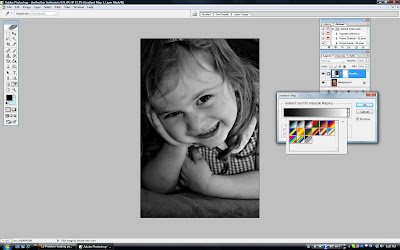
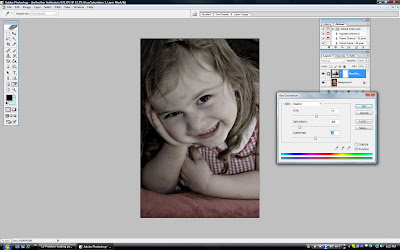
For a vintage look, do Layer>New Adjustment Layer/Hue/Saturation
 And then slide the saturation slider (and others, if need be) to take out some of the color from the photo. (Ctrl-Shift-E to flatten if you are satisfied)
Hope this helps you to see a few more of the fun little ways to tweak your photos in photoshop!


You are doing great with the photoshop!!!
ReplyDeleteThanks for the shout-out, girl!! I REALLY need to upgrade my version of PS so I can play along with all this stuff you're doing! =)
ReplyDeleteI'm off to check out picnick now!
I'm off to check out picnick too. Thanks!
ReplyDelete